
DIY vs. Professional Product Photography: A 6-Step Phone Setup, and When a Pro Is Worth It
DIY vs professional product photography comes down to one question: is the photo the main thing selling the product? For social posts, small restocks and testing new items, a phone, a window and two white boards are enough, and we show you exactly how below. For a store launch, marketplace listings, glossy or glass products, on-model fashion or ads, professional product photography usually pays for itself, and in Lebanon it starts at $80 for an hour at StudioLebanon.
We are a studio, so you might expect us to tell you never to shoot your own products. We will not. Plenty of Lebanese brands, from home bakers in the Metn to skincare startups in Beirut, should start with DIY. The first half of this guide is a phone setup that genuinely works. The second half is an honest look at where DIY stops working, and what the cheaper middle option (renting a studio) and the full professional option actually cost.
Finding 1: Compare cost per usable image, and count your own hours
Claim: DIY looks free because you already own a phone. It is not free: it costs your time, and every photo you reshoot or never use is time lost.
Data: Most photographers and studios quote product work per image or per session, and many don’t publish their rates, which makes the DIY-or-pro decision harder than it should be. So here are ours. Our own product photography is $80 for the first hour and $70 for each additional hour, so 2 hours are $150, 3 hours $220 and 4 hours $290, with retouching, color correction, background removal and store-ready files included. Our product photography pricing guide walks through a full worked example.
On the DIY side, the real cost is hours. A first-timer usually spends an afternoon setting up, shooting, reshooting and editing a batch that a studio shoots in under an hour. That is fine when you have time and few products. It stops being fine when you have 60 SKUs, a launch date and a shop to run.
Practical translation: If you have more than 20 products to shoot, put a price on the afternoon DIY will take you and compare it with an $80 studio hour before you pick up the phone.
Finding 2: A DIY phone setup that actually works
Claim: Most bad DIY product photos are a light problem, not a phone problem. Fix the light and the background, lock the exposure, and a recent smartphone produces images that are perfectly good for Instagram and WhatsApp catalogs.
Data: Here is the exact setup we recommend to clients who want to shoot their own products between studio sessions. It costs a few dollars in materials from any stationery shop, plus a phone tripod if you do not have one.
- Use a big window, not the sun. Set a table next to a window that does not get direct sunlight, and turn off the room lights so colors do not mix. If the sun hits the window, tape baking paper or a white sheer curtain over it to soften the light.
- Make a white sweep. Tape one end of a large white poster board to the wall and let it curve down onto the table. The curve removes the horizon line behind the product.
- Add a white bounce card. Stand a white foam board on the side opposite the window to lift the shadows. For glossy bottles, use a black card instead to draw clean dark edges.
- Put the phone on a tripod and step back. Wide lenses stretch products close up, so shoot from a little further away with the 2x lens if your phone has one, then crop. A tripod keeps every product at the same height and angle.
- Lock focus and exposure. On an iPhone, tap and hold on the product until “AE/AF Lock” appears. On most Android phones, use Pro mode. Turn off the flash and wipe the lens before you start.
- Shoot the same set of angles every time: front, 45 degrees, back or label, a close-up of texture, and one shot in hand for scale.
Then edit lightly and consistently: straighten, crop to the same ratio for every product (square for stores, 4:5 for the Instagram feed), and correct the white balance so white looks white. Do not over-sharpen and do not use beauty filters on products; customers notice.
| DIY item | What it fixes | Tip |
|---|---|---|
| Large white poster board | Clean, seamless background | Buy two; one gets dirty fast |
| White foam board | Dark shadows on one side | Move it closer for brighter fill |
| Black card | Flat, gray edges on glass | Place it just out of frame |
| Baking paper or sheer curtain | Harsh sunlight | Tape it flat across the window |
| Phone tripod with a clamp | Tilted, inconsistent angles | Mark its position on the table with tape |
| Clips and museum putty | Products rolling or leaning | Hide them behind the product |
Practical translation: Build this setup once, leave it standing, and shoot in the same spot at the same time of day every time.
Finding 3: DIY breaks down in five predictable places
Claim: The phone setup above works for matte, simple products shot in small batches. It struggles in five situations, and those are exactly the situations where photos carry most of the sale.
Data: Etsy’s own buyer surveys found that 90% of shoppers said photo quality was “extremely” or “very” important to a purchase decision. The Baymard Institute’s product page research found that 56% of users start by exploring the product images, and that 25% of the ecommerce sites it benchmarked had images with too little resolution or zoom. When the photos are the product page, DIY shortcuts show.
- Glass, metal and gloss: perfume, bottles, jewelry and sunglasses reflect the whole room. Controlling reflections needs large modifiers and flags placed precisely.
- Pure white backgrounds: marketplaces like Amazon require a pure white main image. A window-lit sweep is almost never truly white, so you end up cutting out products by hand.
- Color-critical products: cosmetics shades and fabric colors shift under changing daylight. A wrong shade means returns.
- Scale and consistency: 100 SKUs shot over five afternoons, in five different lights, will not look like one brand in a collection grid.
- People: on-model fashion and lifestyle shots need lighting, direction and usually a model. Our fashion product shoot guide explains how that works.
Practical translation: If your products fall into two or more of the situations above, DIY will cost you sales or reshoots.
Finding 4: The middle path: rent a studio and keep shooting yourself
Claim: Between “phone on the kitchen table” and “hire a photographer” there is a third option many Lebanese brands miss: rent an equipped studio for a few hours and shoot with your own camera or phone.
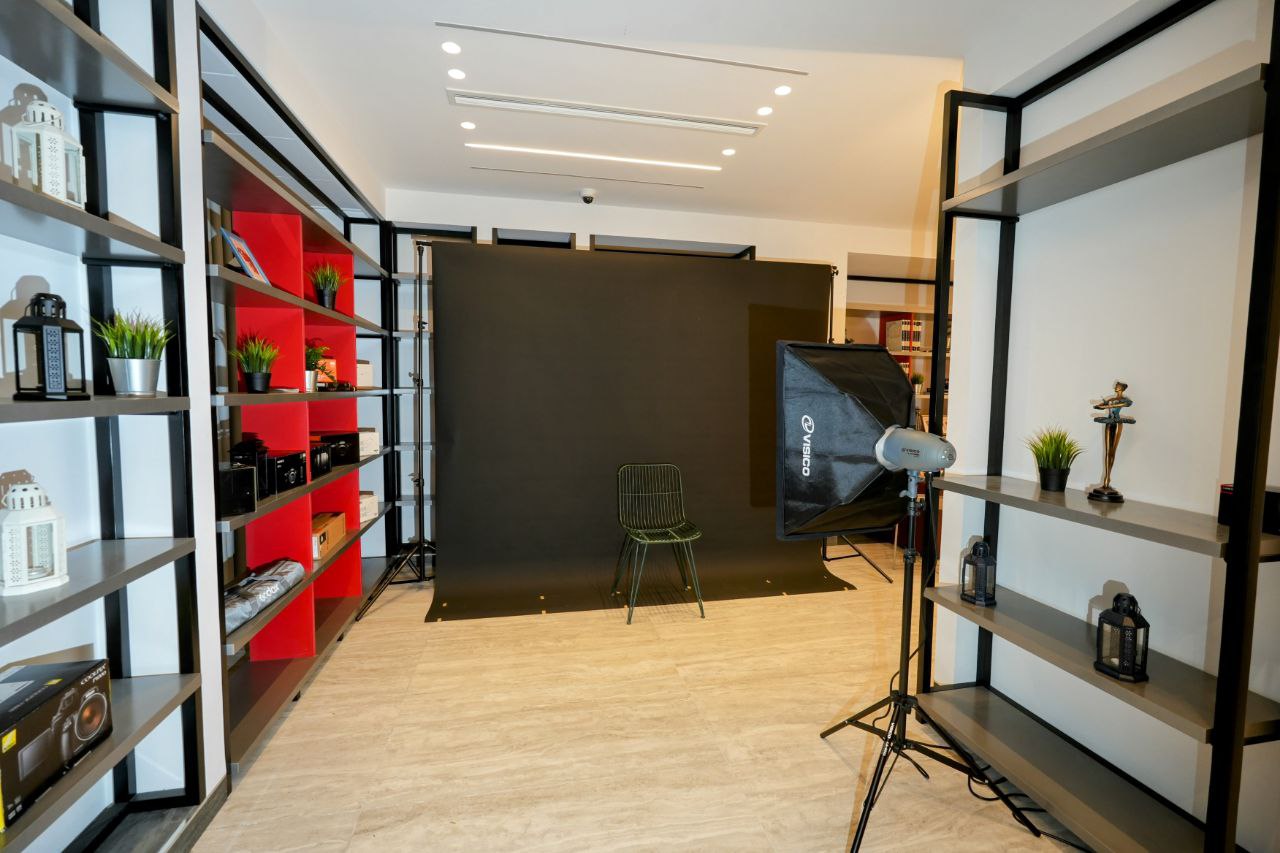
Data: Our studio rental is $50 for 1 hour, $120 for a half day (4 hours) and $200 for a full day (8 hours). That includes an Amaran 300C RGB LED, two Godox spotlight attachments, two flashes with trigger, softboxes, C-stands, a backdrop support and a private changing room. You get controlled, repeatable light without buying any of it. Our studio rental rates guide explains when an hourly, half-day or full-day booking makes most sense.
If you shoot every week, buying a light can make sense instead. A single continuous light such as the Amaran Ray 120c ($255) or the Godox Litemons LE300Bi ($270) on a stand turns a DIY corner into a small, consistent setup. Browse the lighting range in our gear shop, which is priced to be the best in Lebanon on original gear, with 2–3 business day delivery across Lebanon, and read our studio lighting comparison before you buy.
Practical translation: Rent first. If you find yourself booking the studio every week, that is the signal to buy your own light.
Finding 5: When professional product photography makes sense
Claim: Hire a professional when the images will be used for a long time, in many places, or with ad money behind them. A good product photo gets reused for a year; a bad one gets paid for every time an ad runs.
Data: This is the decision table we share with clients who ask whether they really need us:
| Your situation | Best option | Why |
|---|---|---|
| Instagram stories, restock posts, testing a new product | DIY phone setup | Speed matters more than polish |
| 10 to 20 matte products for a WhatsApp catalog | DIY or 1 hour in a rented studio | Consistent light is the main upgrade |
| You own a good camera and want control | Studio rental from $50/hour | Pro light without pro fees |
| Store launch, Shopify or marketplace listings | Professional | Consistency and pure white backgrounds sell |
| Perfume, jewelry, glass, cosmetics shades | Professional | Reflections and color accuracy |
| On-model fashion, paid ads, packaging, print | Professional | Direction, models, retouching |
Practical translation: Match your situation to a row. Be honest about which one you are in.
What didn’t actually matter: the camera
The most common question we get from DIY sellers is which camera to buy. For most small brands, it is the wrong first purchase. A recent phone on a tripod, in soft window light with a white bounce card, beats an expensive camera used on a kitchen counter under a ceiling bulb.
The order of upgrades that actually changes results is: light, then background, then tripod, then camera. If you do eventually want a dedicated camera, our gear shop stocks original Canon and Sony bodies at the best prices in Lebanon, but spend on light first.
What to do this week
- Build the window setup above and shoot your 5 best-selling products with the same 5 angles.
- Put those photos next to your competitors’ on a phone screen and judge them honestly.
- List which of your products are glossy, color-critical or need a model; those are your professional-shoot list.
- If you have your own camera, book a 1-hour studio rental and compare the results with your window shots.
- For anything on your professional list, send us your product count through the contact page for a quote.
FAQ
Can I take good product photos with my phone? Yes, for matte products and social media. Use soft window light, a white sweep, a white bounce card and a tripod, and lock focus and exposure. Phones struggle most with reflective products, pure white backgrounds and accurate colors.
Is professional product photography worth it for a small business in Lebanon? It is worth it when the photos drive most of your sales: a store launch, marketplace listings, ads or products that are hard to light. At StudioLebanon, a professional session starts at $80 for one hour with editing included, which is often less than a day of your own time.
What is the cheapest way to get better product photos? Improve your light before anything else. After that, renting an equipped studio for an hour ($50 at StudioLebanon) gives you professional lighting without paying a photographer, as long as you are comfortable shooting yourself.
Should I buy lights or rent a studio? Rent if you shoot occasionally. If you shoot every week, one good continuous light on a stand usually pays for itself within a few months of rentals. Our gear shop sells lights from $230, priced to be the best in Lebanon, and ships across Lebanon in 2–3 business days.
Can a professional edit the photos I took myself? Editing can fix exposure, crop and color, but it cannot fix harsh shadows, reflections or blur. If a batch needs heavy rescue, reshooting it properly is usually faster and cheaper.
Not sure which side of the line you are on?
Send us a few of your DIY photos and a list of your products. We will tell you honestly which ones are fine as they are, which ones only need a rented studio hour, and which ones deserve a professional shoot. Reach us on our contact page or on WhatsApp at +961 76 393 638.